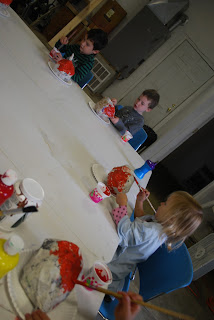
In preschool art class we took the last two weeks to create some fantastic paper mache pumpkins!
This is really fun and really easy to do. I love to work with forms made out of paper so that the kids only really need to add one layer of paper mache to get a good hard painting surface. So you can use your imagination and come up with any sort of shape you can make with a lunch bag and some newspaper stuffing. We have done snowmen and pumpkins in this way so far.
You will need:
-Flour
-water
-salt
-newspaper (for stuffing the form and for small pieces to paste on)
-paper lunch sacks
-some masking tape
-twisty ties
- red, yellow, orange, and brown paint
- brushes
 The Process:
To make the paste mix 1 part flour to 2 parts warm water in a large bowl with a whisk. Mix in a Tbsp or so of salt to help preserve it. The paste is fun to use when it is warm, but it is fine to use several hours later as well.
To make the form we took the paper sacks and stuffed them with wadded up papers until it was just as plump or tall and skinny as we wanted our pumpkin to be. Next we took a twisty tie to tie off the top of the bag. To make the stem we simply twisted the top of the bag and secured it with a bit of tape. We used a small piece of tape on each corner as well to bring up the square edge into our pumpkin shape.
Once the form is ready you can begin the paper mache! Just dip the small pieces of torn newspaper into the paste until it is completely covered in goo and then remove excess goo by sliding it between two fingers. Apply the pasted paper to the form and smooth it out, continue to apply more pieces. Overlap pieces so that the entire form is completed covered. Allow to dry for several hours. It will be nice and hard and ready to paint. At this point you could do another layer of paper mache in white copy paper so that it takes less coats of paint, or you can give it a base coat of white paint to help with coverage.

During our second class we discussed color mixing and how to come up with orange. We made our own orange paint by mixing yellow and red and talked about how red is a "stronger" color than yellow. We discussed how to get a lighter orange verses a darker orange, etc. The rest is artistic history! They turned out super cute and just in time for Halloween and/or Thanksgiving display.
To fill the remaining time during our second class while our pumpkins were drying we created a tree collage. We traced our arms and hand to make the tree trunk and limbs. We added some texture to the trunk with brown crayon so it looked more like bark. Next we glued on bits of colored tissue papers for leaves. Finally we embellished with drawings. It would be fun to do one of these trees to represent each season and display them together!
Here is a photo of the paper mache snowmen that my students made in another preschool art session. We used the same process and made the forms out of bags. This time we filled the bag half way and then did a twisty tie, filled the remainder for the head and taped off the top of the bag. As you can see we used dried beans for the face (painted lima beans and plain black beans for the mouth). Cotton balls were glued around the bottom to hide imperfections and to look like snow. We also learned how to finger knit to make the scarves! very fun


