Wednesday, March 21, 2012

Summer ART Camps!


This summer I will be offering the following art camps at my studio. We will explore all kinds of fun art projects in a variety of mediums.
Register today by email at artwithaubrey@gmail.com or by phone at 765-237-9002!


For artists 7 years and up 
June 11-14 from 10-11:00 am each day
Cost = $35 per student


For artists 3-6 years 
June 18-21 from 10-11:00 am each day 
Cost = $35 per student


Watercolor Lesson 4

Black glue and watercolors!

This week we tried something completed new. 
We drew with black glue and then painted with our watercolors. 

To make the black glue I simply added black acrylic paint to white glue. I have a few tips on this! 1. You can obviously use any color of paint you would like to tint the glue, 2. if you warm the glue slighting in the microwave (10-15 seconds) it makes it easier to mix it by shaking the bottle, 3. use a skewer to stir at the very bottom of glue bottle, 4. it is ok if the glue still appears dark gray when wet- it always dried black, and 5. I used school glue and it worked great. It did dry relatively flat so if you wanted it to stay more beaded up you might try regular white glue.

So, the kids created a simple line drawing on watercolor paper in pencil. Then drew over it with the glue. Once it was all dry (several hours) it was fun to paint inside the "cells" created by the black glue.
We continued to use what we learned in the first few classes about mixing color and using wet on wet vs. wet on dry techniques. 

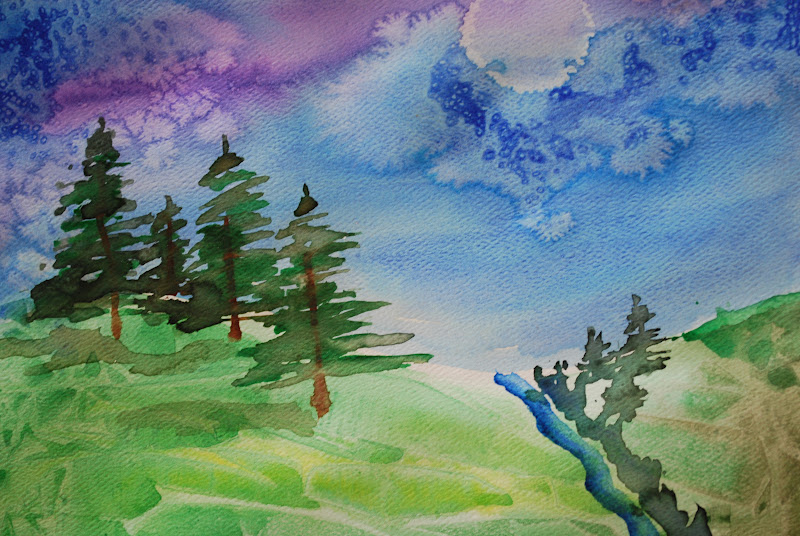
The results are amazing. I think some of them have a stained glass look. There are so many fun things you could use this for. Happy experimenting!


Watercolor Lesson 3


Landscapes!

This week we put the techniques and skills that we have learned so far into a landscape painting.


We used the wet on wet technique to add a ground and sky to our papers.

We added plastic wrap to our landscape to give it texture. We added salt to our sky to add interest and a sort of "starry" effect. Finally, we learned how to lift color to create a moon. To do this we used wooden cylinder blocks covered in paper towel. While the paint is still wet simply place the covered block where you want to lift the color and you have a moon!  It is fun to think of all the different shapes and ways this could be used!


Once the backgrounds were dry we added the details with a wet on dry technique.

 I love how each painting turned out so unique even though we were all following the same basic instructions. My goal is to teach students the information they need to feel confident with a media so that they will explore and be artists rather than simply copy. These turned out beautiful!


We also created pocket books to hold all of our technique cards! For full instructions on how to create this great book that can also be used to display your art go here!


Thursday, March 8, 2012

Storybook art - Elmer

We continued our storybook art theme this week with the book "Elmer" by David McKee


We read the book and discussed pattern a bit. I gave each of the kids a grid that I created here. This site is really cool, you can create just about any size and kind of grid you choose as a PDF and download it for free!

The kids got to work filling in each square with a crayon design or pattern.


When our crayon work was done we used some watercolors to wash over some of our designs and to add more color.


 I love what I see!


Our final pieces were inspired by this Elmer book cover.


At the end of the story all of the elephants decorate themselves for a special parade to honor Elmer!
We decorated our own elephant for the parade with markers and crayons and then glued our elephant to his patchwork home!


Storybook art - Hungry Caterpillar

Preschool/Kinder Art is BACK!

We started out our first session with a unit on storybook art. Children's books are so beautiful and I love to watch as children themselves adapt the illustrators' techniques into 
fabulous artwork of their own. 

In this class we read the story "The Very Hungry Caterpillar" by Eric Carle. We looked at some of his other books and talked about the artwork. We discussed his compositional style a little and how he creates with collage and painting. 

We got to work glueing some tissue papers onto card stock in orange and yellow to later be used for a sun in our caterpillar paintings


We set the sun papers aside to dry and discovered a whole new way to do printmaking! We used balloons. This was really fun and a great way to start our caterpillar bodies on a piece of large white paper. I first saw this idea here. If I were to teach this class again I would have allowed time to just play around with this new fun technique! Who can't use more printed paper!


Once everything was dry we cut out pieces for our suns and glued them on.


Then we used markers and crayons to add more details to the caterpillar print.


I love how these turned out!